How to Install and Use WD Drive Utilities Software |
您所在的位置:网站首页 › install tools&utilities › How to Install and Use WD Drive Utilities Software |
How to Install and Use WD Drive Utilities Software
 Guided Assist Answer ID 50392: WD Drive Utilities External Drive Management Guided Assist
WD Drive Utilities features the ability to:
Run drive diagnostics
Manage RAID configuration (For RAID supported models)
Erase and format drive
Set drive sleep timer (on supported drives)
Register drive
Guided Assist Answer ID 50392: WD Drive Utilities External Drive Management Guided Assist
WD Drive Utilities features the ability to:
Run drive diagnostics
Manage RAID configuration (For RAID supported models)
Erase and format drive
Set drive sleep timer (on supported drives)
Register drive
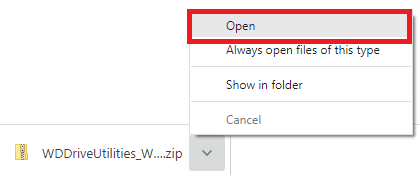
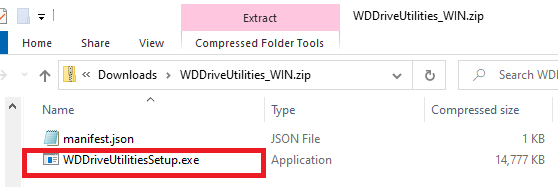
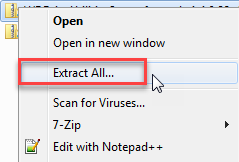
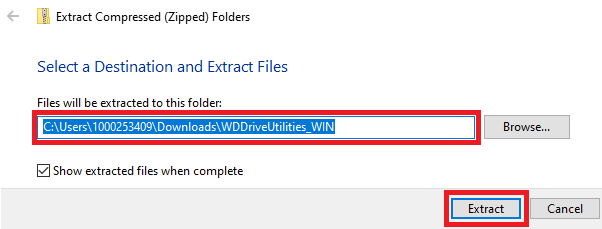
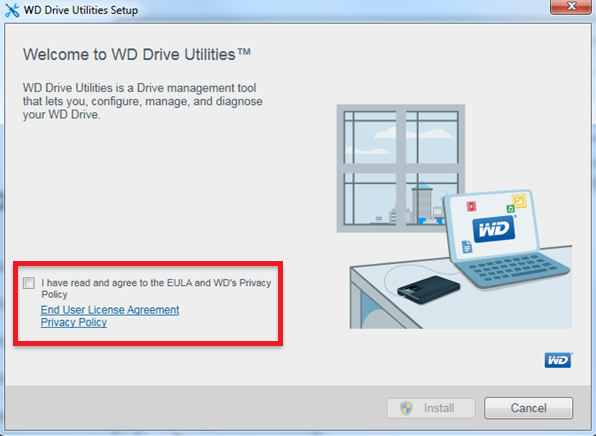
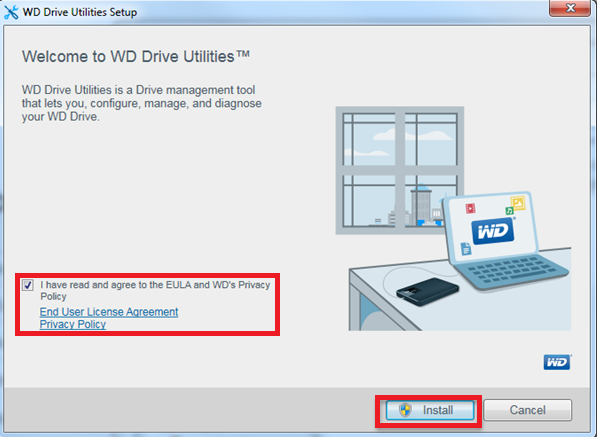
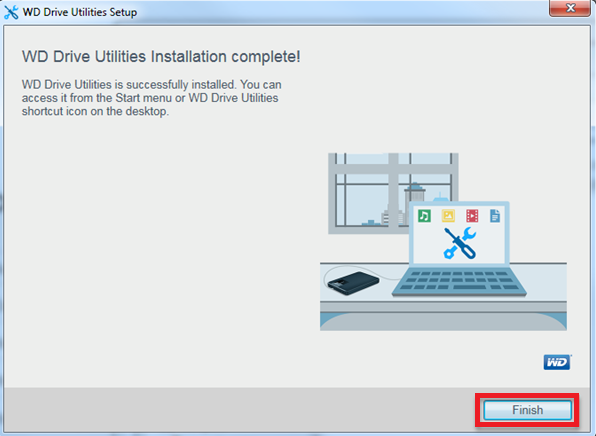
Software Download WD Drive Utilities for Windows WD Drive Utilities for macOS Instructions for Windows and macOS About WD Drive Utilities Download and Install on Windows Download and Install on macOS Check Drive Health Erase and Format Drive Drive Sleep Timer LED Settings RAID Management Answer ID 51136: Steps to Uninstall WD Drive Utilities or WD Security Software on Windows Answer ID 51137: Steps to Uninstall WD Drive Utilities or WD Security Software on macOS Need more help? Answer ID 6265: Attach a Supported WD Drive Message in WD Security & WD Drive Utilities Download and Install on WindowsFollow the steps to install WD Drive Utilities for Windows. Download and install WD Drive Utilities. WD Drive Utilities for Windows Click Save.
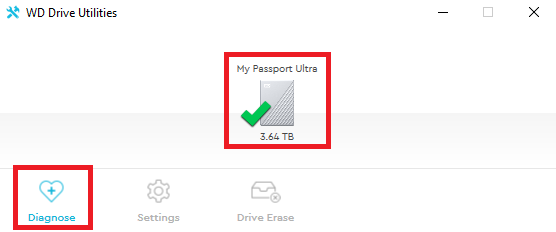
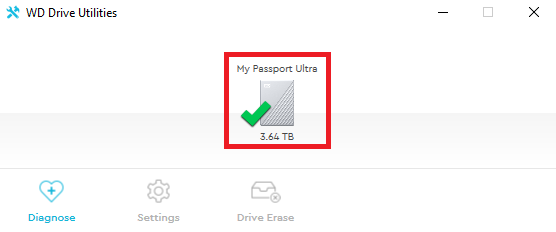
Check the drive for errors. Select a drive to test. Click Diagnose.
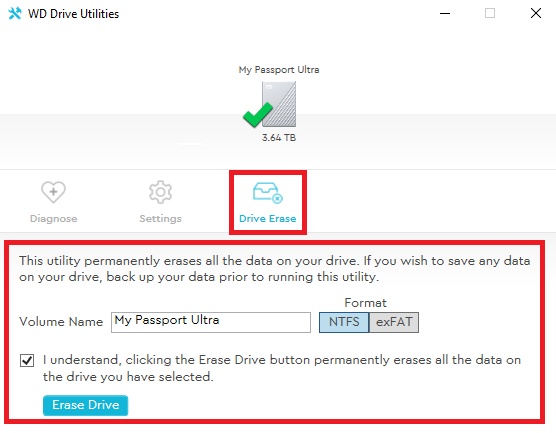
A drive that fail any test should not be used for storage.The drive should be replaced. Need more help? Answer ID 4666: WD Drive Utilities Complete Test False Failure Message on macOS Answer ID 12163: S.M.A.R.T. Self-Monitoring Analysis and Reporting Technology Answer ID 33498: Western Digital Warranty Replacement and Data RecoveryReturn to Top Erase and Format DriveErase and format the drive.  Critical:
The process is Data Destructive and cannot be undone.ALL THE DATA ON THE DRIVE WILL BE LOST! Select a drive.
Critical:
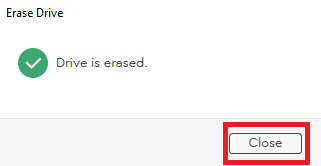
Do Not close the window until the Drive Erase is done.
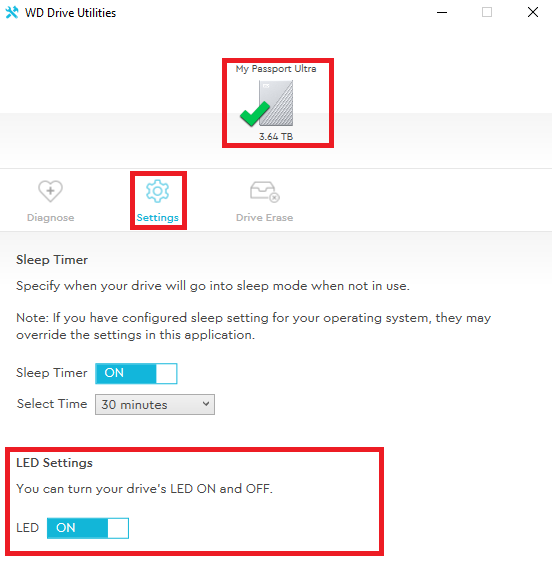
Return to Top Drive Sleep TimerThe drive sleep timer turns off power to the drive after a set of amount non-use time, conserves power, and lessens long-term wear. 
Sleep timer does not work for for My Passport SSD, My Passport Go, My Passport Pro, My Book Thunderbolt Duo, and My Book Studio II. Connect a supported drive. Open WD Drive Utilities. Select a drive. Click Settings. Click to Toggle OFF and ON Sleep Timer. (default=ON) Select a different time from the menu (default=30 minutes)
Turn Off and On the LED of a supported drive. (Default=On) Connect a supported drive with an LED. Open WD Drive Utilities. Select a drive. Click Settings. Click to Toggle OFF and ON the drive LED.
Return to Top RAID Management IMPORTANT:The RAID screen will not who unless the drive has two drives and supports RAID. Check the drive status and change the RAID mode. RAID 0 - (default) max capacity and speed, no data protection RAID 1 - max data protection, half capacity JBOD - individual drives, max capacity, no data protection Need more help? Answer ID 659: RAID Levels Supported with Western Digital ProductsCheck RAID Status Check the current RAID mode and status of a drive. Open WD Drive Utilities. Connect a RAID model drive to the computer. Select the drive. Click RAID Management. Click RAID Status
My Book Duo Drive Status Location Regardless of Drive Label Number Drive A or Drive 1 Status refer to the drive in the LEFT bay from the front view. Drive B or Drive 2 Status refer to the drive in the RIGHT bay from the front view.Change Drive Configuration Changing the RAID mode reformats both drives.
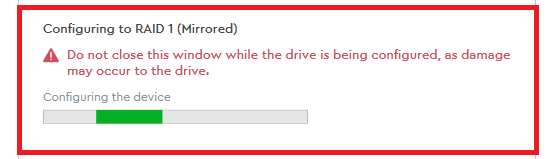
Critical:
The process is Data Destructive and cannot be undone.ALL THE DATA ON THE DRIVE WILL BE LOST! Select RAID Management. Select Configuration. Select a RAID mode. Stripe - (default) max capacity performance (RAID 0), not fault tolerance Mirror - max data protection (RAID 1), but half the capacity Individual Drives (JBOD) - max capacity, no data protection Enter a Volume Name(s) for the drive. Select NTFS or exFAT File System Format.
JBOD requires two Volume Names and two Format slections. Volumes should not have the same name. Check the Box. Click Configure.
Critical:
Do Not close the window until the RAID change is done.
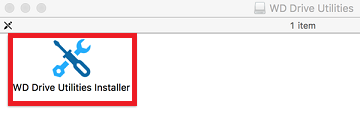
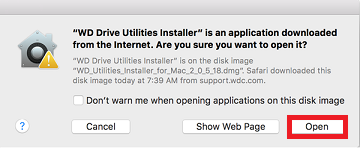
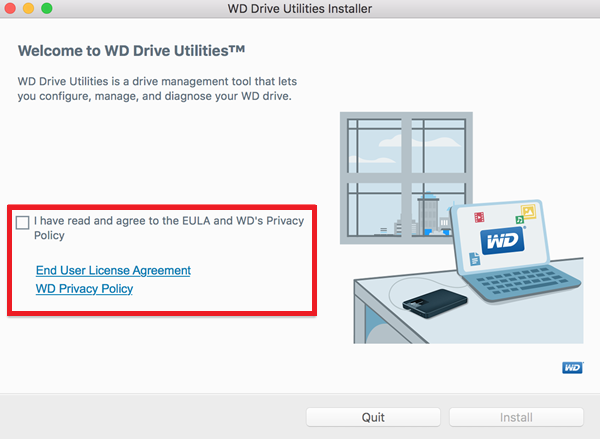
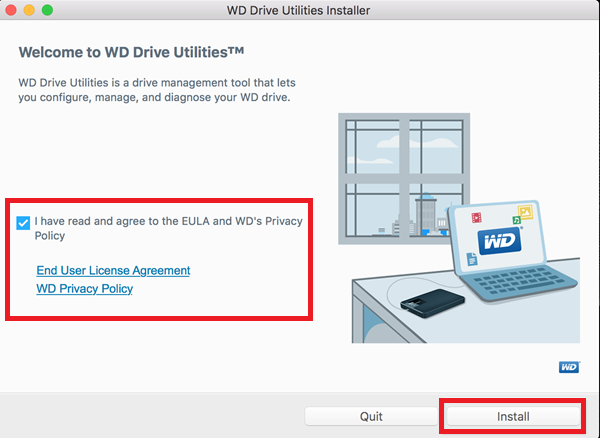
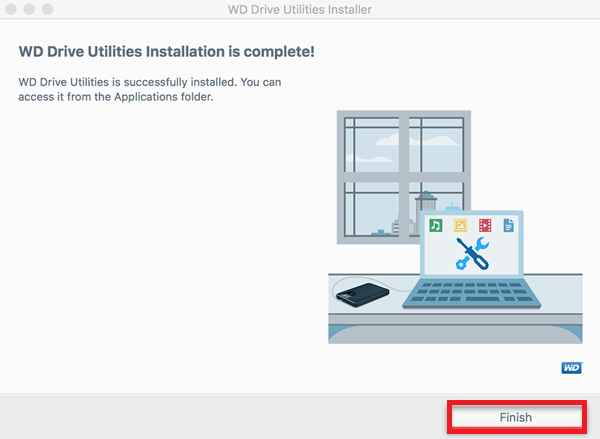
Return to Top Download and Install on macOSFollow the steps to install WD Drive Utilities for macOS. Download and install WD Drive Utilities. WD Drive Utilities for macOS Go to Downloads folder. Unzip WDDriveUtilities_MACOS.zip. Open WD_Utilities_Installer_for_Mac.dmg. Open exec folder. Double-click WD Drive Utilities Installer.
Return to Top Check Drive HealthCheck the drive for errors. Select a drive to test. Click Diagnose.
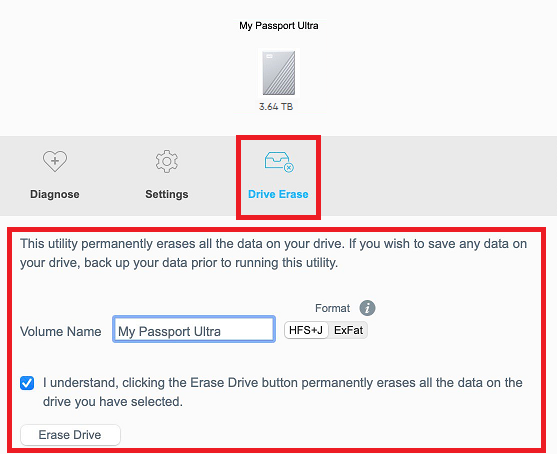
A drive with errors should be replaced. Need more help? Answer ID 33498: Western Digital Warranty Replacement and Data Recovery Return to Top Erase and Format DriveErase and format the drive.
Critical:
The process is Data Destructive and cannot be undone.ALL THE DATA ON THE DRIVE WILL BE LOST! Select a drive.
Critical:
Do Not close the window until the Drive Erase is done.
Return to Top Drive Sleep TimerThe drive sleep timer turns off power to the drive after a set of amount non-use time, conserves power, and lessens long-term wear.
Sleep timer does not work for for My Passport SSD, My Passport Go, My Passport Pro, My Book Thunderbolt Duo, and My Book Studio II. Select a drive. Click Settings. Click to Toggle OFF and ON Sleep Timer. (default=ON) Select a different time from the menu (default=30 minutes)
Turn Off and On the LED of a supported drive. (Default=On) Open WD Drive Utilities. Connect a supported drive with an LED to the computer. Select a drive. Click Settings. Click to Toggle OFF and ON the drive LED.
Return to Top RAID Management IMPORTANT:The RAID screen will not who unless the drive has two drives and supports RAID. Check the drive status and change the RAID mode. RAID 0 - (default) max capacity and speed, no data protection RAID 1 - max data protection, half capacity JBOD - individual drives, max capacity, no data protection Need more help? Answer ID 659: RAID Levels Supported with Western Digital ProductsCheck RAID Status Check the current RAID mode and status of a drive. Open WD Drive Utilities. Connect a RAID model drive to the computer. Select the drive. Click RAID Management. Click RAID Status
My Book Duo Drive Status Location Regardless of Drive Label Number Drive A or Drive 1 Status refer to the drive in the LEFT bay from the front view. Drive B or Drive 2 Status refer to the drive in the RIGHT bay from the front view.Change Drive Configuration Changing the RAID mode reformats both drives.
Critical:
The process is Data Destructive and cannot be undone.ALL THE DATA ON THE DRIVE WILL BE LOST! Select RAID Management. Select Configuration. Select a RAID mode. Stripe - (default) max capacity performance (RAID 0), not fault tolerance Mirror - max data protection (RAID 1), but half the capacity Individual Drives (JBOD) - max capacity, no data protection Enter a Volume Name(s) for the drive. Select HSF+ or exFAT File System Format.
JBOD requires two Volume Names and two Format slections. Volumes should not have the same name. Check the Box. Click Configure.
Critical:
Do Not close the window until the RAID change is done.
Return to Top About WD Drive Utilities WD Drive Utilities features the ability to: Run drive diagnostics Manage RAID configuration (For RAID supported models) Erase and format drive Set drive sleep timer (on supported drives) Register driveSupported Drives Direct Attached Storage (DAS) Drives: My Book, My Book for Mac, My Book Duo, My Book Pro, WD Drive Plus, WD easystore Desktop, WD easystore Portable, My Passport works with USB-C, My Passport, My Passport for Mac, My Passport Ultra, My Passport Ultra for Mac, My Passport Ultra (USB-C), My Passport Ultra for Mac (USB-C), My Passport Go, My Passport Air, My Passport Ultra Metal, WD Elements SE, WD Backup Drive Desktop Drives not listed are above not supported. Drive Diagnoses S.M.A.R.T. test does not support SSD. Attach a Supported WD Drive message.Need more help?Answer ID 6265: Attach a Supported WD Drive Message in WD Security & WD Drive Utilities Supported Operating Systems Windows Windows 11 Windows 10 32-bit & 64-bitmacOS macOS 14 Sonoma macOS 13 Ventura macOS 12 MontereyReturn to Top |


【本文地址】